Building A Multi Tenant System Using PostgreSQL And Django
Trupti Panchal
Multitenancy
Multitenancy refers to a software application that serves multiple distinct groups of users sharing a single instance of running software. From a database perspective, this means that a single instance of a database is utilized by multiple applications.
We need to achieve the following for successfully building a multitenant system.
- Multiple customers running on the same instance
- Shared and Tenant-Specific data
- Tenant View-Routing
I will walk you through an implementation where we have used Postgres for the database and Django framework for the front end. We have used nginx/uwsgi for deployment of the system.
Prerequisites to understand this article
- Postgres
- Django
- Nginx (good to know)
- Uwsgi (good to know)
- Systemd service (good to know)
Brief introduction about the prerequisites
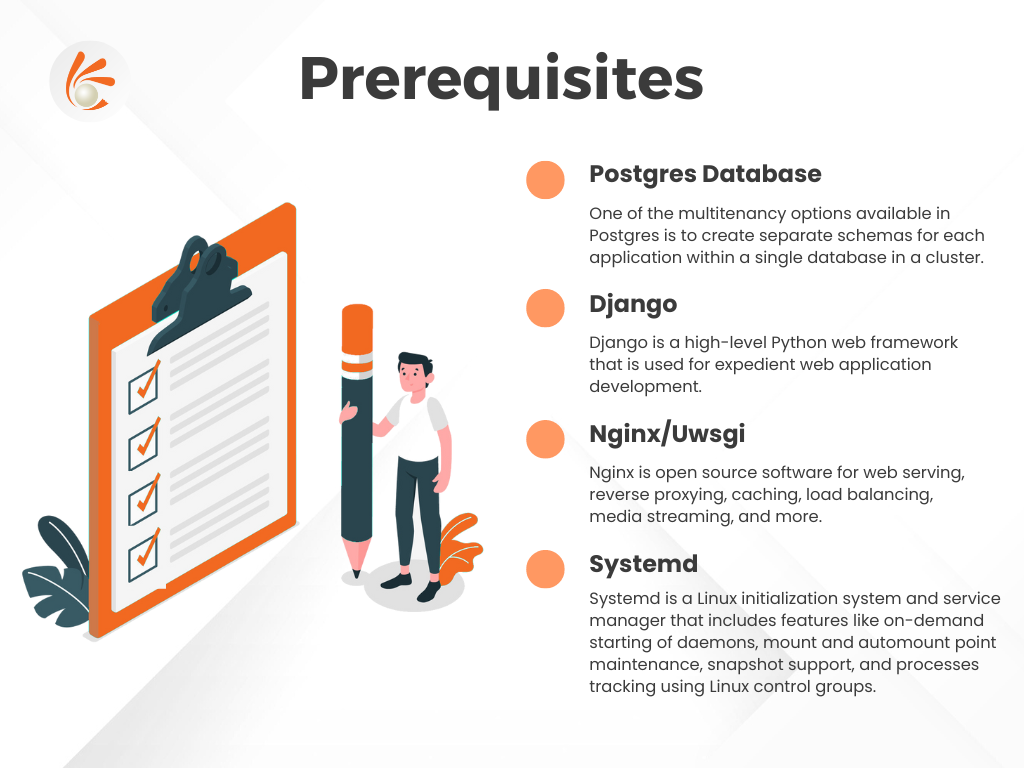
Postgres Database
One of the multitenancy options available in Postgres is to create separate schemas for each application within a single database in a cluster. By using schema-level privileges to restrict the access of a tenant application to only the application’s specific schema, we enable some level of data isolation between each application. We took advantage of this feature and implemented our system based on this.
Django
Django is a high-level Python web framework that is used for expedient web application development. Native Django does not provide a simple way to support multiple tenants using the same project instance, even when only the data is different.
Nginx/Uwsgi
- Nginx is open source software for web serving, reverse proxying, caching, load balancing, media streaming, and more. It started out as a web server designed for maximum performance and stability.
- The uWSGI project aims at developing a full stack for building hosting services.
- uWSGI operates on a client-server model. Your web server (e.g., nginx) communicates with a django-uwsgi “worker” process to serve dynamic content.
- Nginx and uWSGI are good choices for Django deployment, but they are not the only ones, or the ‘official’ ones. There are excellent alternatives to both, and we encourage you to investigate them.
- A web server faces the outside world. It can serve files (HTML, images, CSS, etc) directly from the file system. However, it can’t talk directly to Django applications; it needs something that will run the application, feed it requests from web clients (such as browsers) and return responses.
A Web Server Gateway Interface – WSGI – does this job. WSGI is a Python standard.
uWSGI is a WSGI implementation. In this Blog we will set up uWSGI so that it creates a Unix socket, and serves responses to the web server via the uwsgi protocol.
Systemd
Systemd is a Linux initialization system and service manager that includes features like on-demand starting of daemons, mount and automount point maintenance, snapshot support, and processes tracking using Linux control groups.
Systemd is the new system and service manager in RHEL 7.

Low level details of implementation
Postgres Database and Django – tenant schemas
Django – tenant schemas
We have used django-tenant-schemas that enables Django powered apps to have multiple tenants via PostgreSQL schemas.
Postgres has a schema called public schema. This is the schema that is used by default, if no schema names are mentioned when doing the database operations. Django-tenant-schemas makes use of this to store the information about the different tenants. Each tenant has its own schema and generic information about the tenants is stored in the public schema. Each tenant is identified via its host name (i.e tenant.domain.com). This information is stored on a table on the public schema. Whenever a request is made, the host name is used to match a tenant in the database. If there’s a match, the search path is updated to use this tenant’s schema. So from now on all queries will take place at the tenant’s schema.
Our Implementation:
For example, suppose you have a tenant customer1 at http://customer1.example.com. Any request incoming at customer1.example.com will automatically use the customer1’s schema and make the tenant available at the request.
Now let us see the configuration, so that when any request incoming at customer1.example.com will automatically use the customer1’s schema.
Postgres Database
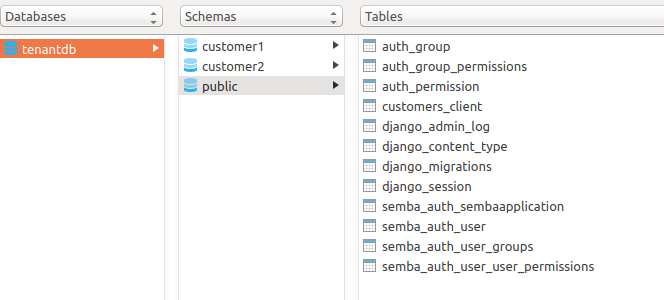
The default schema of Postgres is public schema. Public schema is used as a route, as to which schema to pick up for a given tenant.
We will create a new schema for every tenant. In this example I have created two schemas
- customer1
- customer2
Basic – Django Settings
You’ll have to make the following modifications to your settings.py file.
Your DATABASE_ENGINE setting needs to be changed to

Add tenant_schemas.routers.TenantSyncRouter to your DATABASE_ROUTERS setting, so that the correct apps can be synced, depending on what’s being synced (shared or tenant).

Add the middleware tenant_schemas.middleware.TenantMiddleware to the top of MIDDLEWARE_CLASSES, so that each request can be set to use the correct schema.
If the hostname in the request does not match a valid tenant domain_url, a HTTP 404 Not Found will be returned.

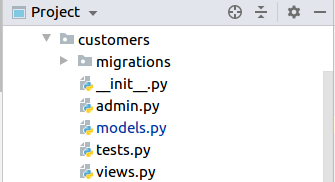
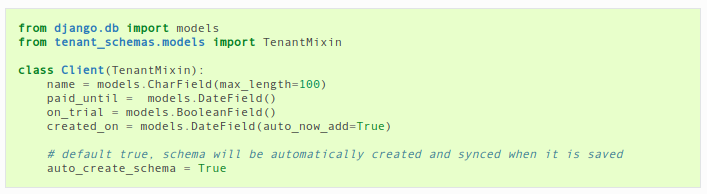
The Tenant Model
Now we have to create your tenant model. Your tenant model can contain whichever fields you want, however, you must inherit from TenantMixin. This Mixin only has two fields (domain_url and schema_name), and both are required. Here’s an example, suppose we have an app named customers and we want to create a model called Client.
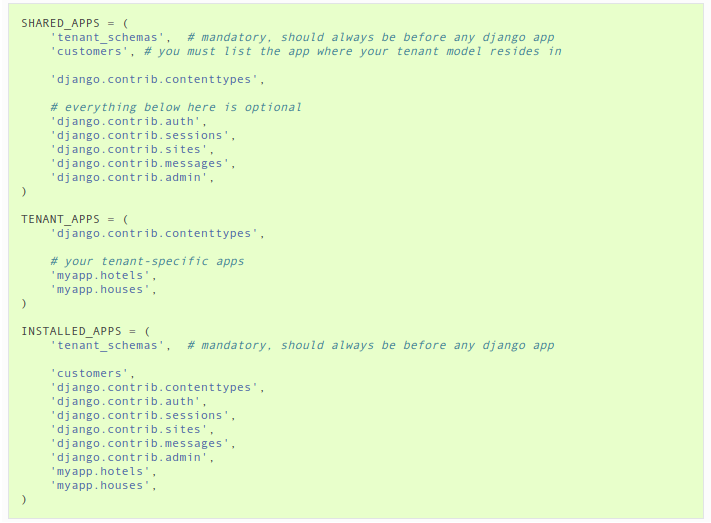
Configure Tenant and Shared Applications – Django settings

Create customer1setting.py file

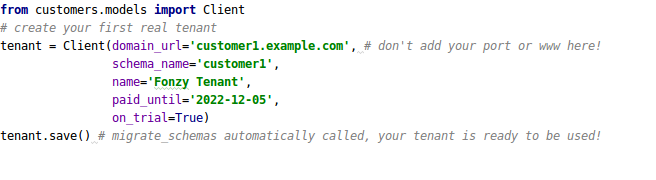
Create Tenant
Now we can create our first real tenant.

Nginx/uwsgi
Create a python virtual environment with the project_name. You can install all your project dependencies in this environment.
Every tenant will have tenant specific
- Uwsgi file
- Ini file
- Nginx file
- Systemd service file
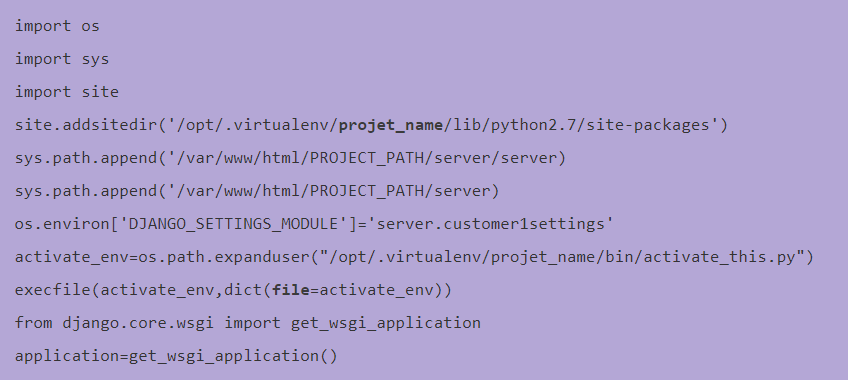
Uwsgi file
Create a file with name “customer1-uwsgi.py” under /var/www/html/PROJECT_PATH/.
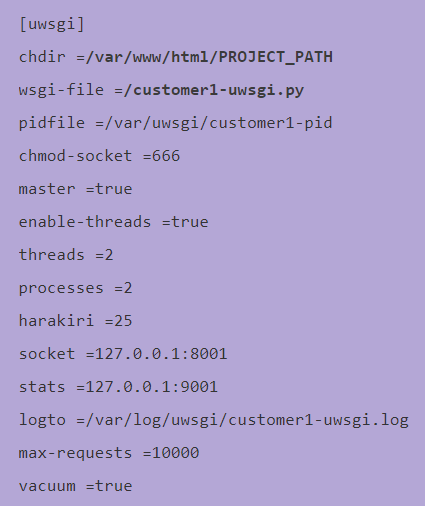
Ini file
Key points:
- Here 8001 is the port number – which will be used in nginx configuration
- Customer1-uwsgi.py – name of the uwsgi file
Create a file with name “customer1.ini” under /var/www/html/PROJECT_PATH/.
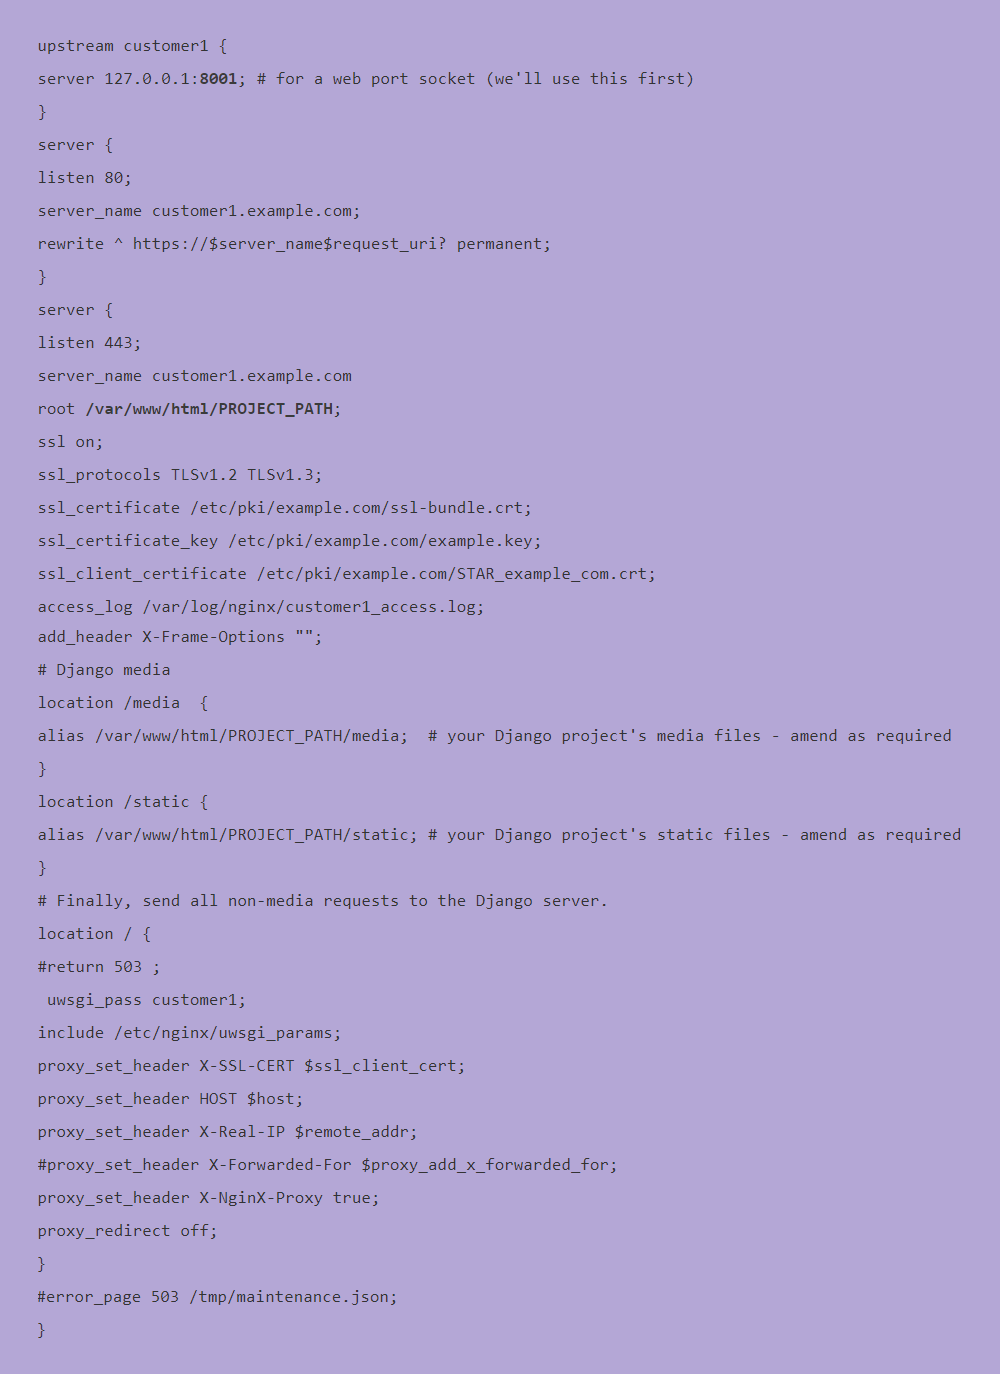
Nginx configuration
Create a file with name “customer1.conf” under /etc/nginx/conf.d/
Key points:
- Here 8001 is the port number mention customer1.ini file
You can reload the nginx with following command
sudo systemctl reload nginx
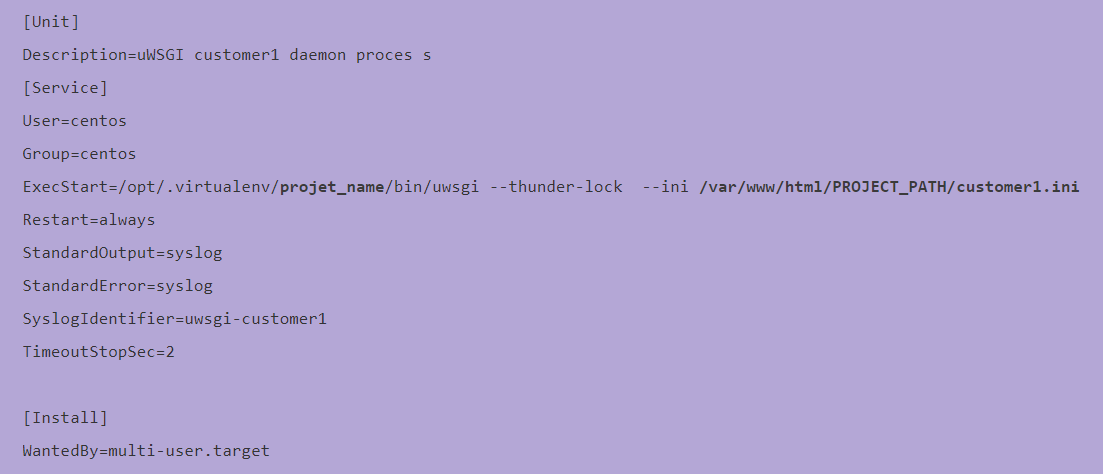
Systemd service
Create a file with name “uwsgi-customer1.service” under /etc/systemd/system/
Key point:
- Here /var/www/html/PROJECT_PATH/customer1.ini is the path to the ini file
You can start the service by running the following command
sudo systemctl start uwsgi-customer1 service
Command to restart
sudo systemctl restart uwsgi-customer1 service
Command to stop
sudo systemctl stop uwsgi-customer1 service
Reference Article
https://django-tenant-schemas.readthedocs.io/en/latest/
Techpearl engineers are well versed in the latest technologies. Contact us to implement SAAS products.